Core Requirements for Passport Photos
At the heart of every successful passport or visa application lies a compliant photo. Understanding the core requirements is crucial; ignoring them can lead to instant rejection. Here's a detailed explanation of the essential elements:- Photo Size: In the U.S., the standard passport photo size is 2x2 inches (51x51 mm). Other countries may have slightly different size requirements, so always check the specific guidelines for your destination. The U.S. Department of State provides detailed specifications.
- Resolution: Your photo must be clear and high-resolution. Aim for at least 300 DPI (dots per inch) to ensure a sharp, detailed image. Avoid blurry or pixelated photos, as these will be rejected. Use a high-quality camera or smartphone and ensure proper focus.
- Background Color: The U.S. requires a plain white or off-white background. Other countries may have different background color requirements. Make sure there are no shadows or patterns on the background. Use a clean, untextured surface to avoid any issues.
- Lighting: Proper lighting is crucial. The photo should be evenly lit, with no shadows on your face or in the background. Avoid harsh lighting that can create glare or wash out your features. Diffused natural light is ideal. Learn how to take a passport photo at home using proper lighting techniques.
- Pose: Face the camera directly with a neutral expression. Both eyes must be open and clearly visible. Do not tilt your head or look away from the camera. The U.S. State Department provides clear examples of acceptable and unacceptable poses. Practice in front of a mirror to find a comfortable, neutral position.
- Digital Alterations: Do not digitally alter your photo in any way. This includes removing blemishes, changing the background, or enhancing your features. The photo must be an accurate representation of your current appearance. Using filters or editing software is strictly prohibited.
Passport Photo Dress Code: What to Wear and What to Avoid
What you wear in your passport photo matters. While there's some flexibility, certain clothing and accessories can lead to rejection. Here's a breakdown of what to wear and what to avoid. Refer to our comprehensive passport photo dress code guide for more information.- Clothing: Wear everyday clothing. Uniforms, or clothes that look like a uniform (such as professional attire like a suit), are not allowed. Choose comfortable clothing that doesn't restrict your pose.
- Accessories: As a general rule, it's best to avoid excessive jewelry and accessories. If you must wear jewelry, keep it minimal and avoid anything that could obscure your face. Large necklaces, earrings, or facial piercings can cause issues. Religious items are an exception; see below.
- Headwear: Hats, caps, or headbands are generally prohibited unless worn daily for religious or medical reasons. In such cases, a signed statement is usually required. The head covering must not obscure your face. Ensure the head covering doesn't cast shadows on your face.
- Religious Attire: Religious head coverings are permitted, but they must not obscure your face. Make sure your full face is visible, from forehead to chin. Ensure the covering is plain and doesn't have any distracting patterns or embellishments.
Hairstyles and Makeup: Guidance for a Compliant Look
Your hairstyle and makeup can also impact the compliance of your passport photo. Here's what you need to know:- Hairstyles: Your hairstyle should not obscure your face. Make sure your forehead and hairline are visible. Voluminous hairstyles are generally acceptable as long as they don't cast shadows or cover your facial features. Experiment with different styles to find one that keeps your face visible. For detailed tips, read our article on hair requirements for passport photos.
- Bangs: Bangs are acceptable, but they must not cover your eyes. If your bangs are too long, it's best to pin them back or to the side. Trim your bangs if necessary to ensure they stay above your eyebrows. See our guide on passport photos with bangs for more information.
- Makeup: Makeup is allowed, but it should be natural and not excessive. Avoid heavy makeup that can distort your facial features. The goal is to look like yourself on a typical day. Avoid using heavy contouring or highlighting, as this can alter your facial appearance. Consult our guide on makeup for a driver's license photo; although not a passport, many of the same principles apply.
Common Mistakes That Lead to Passport Photo Rejection
Even seemingly minor errors can lead to passport photo rejection. Here are some of the most frequent mistakes to avoid:- Poor Lighting: Shadows, glare, or uneven lighting can all lead to rejection. Make sure your face is evenly lit and free from shadows. Avoid taking photos in direct sunlight, which can cause harsh shadows.
- Incorrect Background: Using a background that is not plain white or off-white is a common mistake. Always use a plain, light-colored background. Use a sheet of white paper or fabric if you don't have a suitable wall.
- Non-Neutral Expression: Smiling, frowning, or making any other expression is not allowed. Maintain a neutral expression with your eyes open and mouth closed. Practice your neutral expression in a mirror.
- Wearing Glasses: As of November 1, 2016, glasses are no longer allowed in U.S. passport photos except in rare medical circumstances. This rule may differ in other countries, so check the local guidelines. If you have a medical need to wear glasses, you'll need a signed statement from your doctor. Review the updated guidelines on passport photos with glasses.
- Digital Alterations: Altering your photo in any way, including removing blemishes or changing the background, is strictly prohibited. Let your natural appearance shine through.
DIY Tips: Taking Compliant Photos at Home
Taking your passport photo at home can be convenient and cost-effective, but it requires attention to detail. Here are some practical tips. Follow our DIY guide on taking passport photos at home for detailed instructions.- Lighting Setup: Use natural light whenever possible. Position yourself near a window, but avoid direct sunlight. If natural light is not available, use two softbox lights to create even illumination. Use lamps with white light bulbs if you don't have access to softboxes.
- Background Selection: Find a plain white or off-white wall to use as your background. Make sure there are no patterns or textures on the wall. Hang a white sheet or use a large piece of white cardboard if you don't have a suitable wall.
- Posing Techniques: Stand about 2-3 feet away from the background. Face the camera directly and maintain a neutral expression. Have someone else take the photo for you, or use a tripod. Use a remote shutter or timer if you're taking the photo yourself.
Addressing Specific Situations
Certain situations require special consideration when taking passport photos:- Infants: Taking passport photos of infants can be challenging. Lay the baby on a plain white sheet or blanket. Make sure their eyes are open and their face is fully visible. You may need someone to hold the baby's head steady. Try taking the photo when the baby is well-rested and content.
- Medical Conditions: If you have a medical condition that prevents you from meeting the standard photo requirements, provide a signed statement from your doctor explaining the situation. You may be required to submit additional documentation. Contact the passport agency in advance to understand the specific requirements.
Note: While glasses are no longer generally permitted in U.S. passport photos, there can be exceptions for medical reasons. Any exceptions will require a signed statement from your doctor.
International Standards
While many of the core requirements are similar across countries, there are also key differences. Always check the specific photo requirements for the country you're applying to. You can often find this information on the embassy or consulate website for your destination country.- Different Size Requirements: Some countries may require a different photo size than the standard 2x2 inches. Research the size requirements for your destination country.
- Background Color Variations: While the U.S. requires a white background, other countries may allow or require a different color. Check the embassy or consulate website for your destination country.
- Specific Pose Instructions: Some countries may have very specific instructions regarding pose and facial expression. Refer to the official guidelines for your destination country.
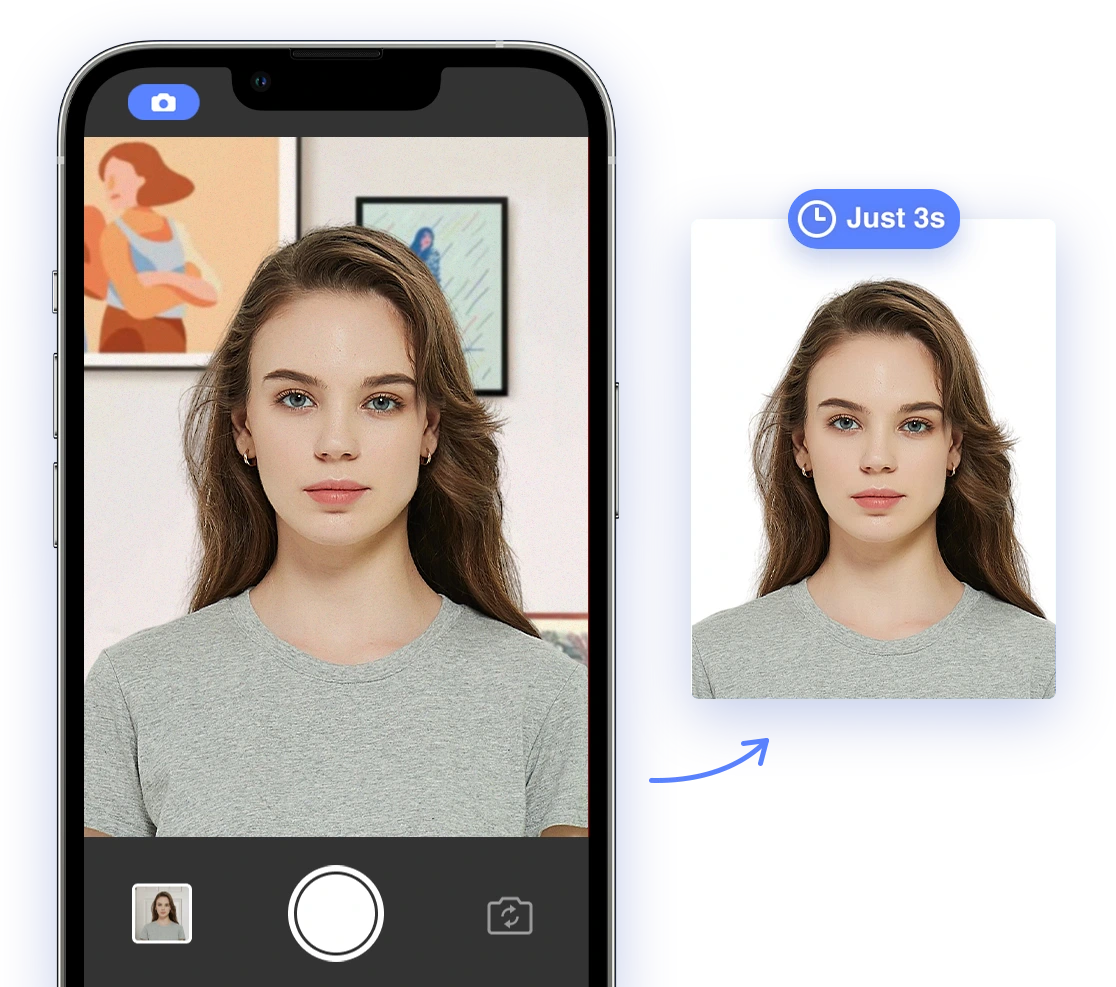
AI-Powered Solutions: Simplifying the Process with AI Passport Photo
Creating compliant passport photos can be complex, but AI-powered tools like AI Passport Photo can greatly simplify the process. These tools offer features such as:- Automatic Background Removal: AI can automatically remove and replace the background with a compliant white background. This feature is especially helpful if you can't find a suitable background at home.
- Automatic Resizing: AI can automatically resize your photo to meet the specific size requirements of your destination country. This eliminates the need for manual adjustments.
- Quality Checks: AI can analyze your photo to ensure it meets all the necessary requirements, including lighting, pose, and resolution. This significantly reduces the risk of rejection. Our article on digital photo analyzers goes into more detail on these tools.
Troubleshooting: What to Do If Your Passport Photo Is Rejected
Even with careful preparation, your passport photo may still be rejected. If this happens, don't panic. Here are the steps you can take:- Identify the Problem: Carefully review the rejection notice to understand why your photo was rejected. The rejection notice will usually provide a specific reason for the rejection.
- Correct the Issue: Address the specific problem identified in the rejection notice. This may involve retaking the photo with better lighting, adjusting your pose, or removing accessories. Refer back to the guidelines in this article to ensure you're meeting all the requirements.
- Resubmit Your Application: Once you've corrected the issue, resubmit your application with the new photo. Make sure to follow all the instructions provided by the passport agency. Double-check all the details before resubmitting.