Applying for a passport or visa can be a stressful process, and a rejected photo only adds to the frustration. A seemingly simple step can become a major obstacle if the photo you submit doesn't meet the stringent requirements set by government agencies. This comprehensive guide, updated for 2026, aims to be the ultimate resource for troubleshooting passport photo rejections, equipping you with the knowledge and tools to ensure your photo meets all official requirements, saving you time, money, and unnecessary stress.
Understanding the Basics of Passport Photo Requirements
Before diving into troubleshooting, it's crucial to understand the fundamental requirements for passport photos. Both US and international standards are quite specific, and even minor deviations can lead to rejection. Let’s explore these basic yet vital guidelines.
Key Requirements for US Passport Photos
The U.S. Department of State has strict guidelines for passport photos. Here's a breakdown of the essentials:
- Size: 2x2 inches (51x51 mm). This ensures uniformity and ease of processing.
- Color: Must be in color. Black and white photos are not accepted.
- Head Size: Head must be between 1 inch and 1 3/8 inches (25 mm - 35 mm) from the bottom of the chin to the top of the head. Proper head size ensures accurate biometric measurements.
- Background: Plain white or off-white. A neutral background prevents distractions and ensures focus remains on the applicant.
- Expression: Neutral facial expression or natural smile with both eyes open. The goal is a clear, recognizable likeness.
- Attire: No uniforms or clothing that resembles a uniform. Everyday attire is acceptable, promoting authenticity.
- Accessories: No hats or head coverings (unless for religious or medical reasons with supporting documentation). This rule ensures the face is fully visible.
- Eyeglasses: No eyeglasses are allowed, unless medically necessary with supporting documentation. Glasses can cause glare and obstruct facial features.
- Quality: Clear, sharp, and in focus. No shadows or glare. A high-quality image is crucial for accurate identification.
Global Passport Photo Requirements: A Quick Overview
While many countries follow similar guidelines to the US, there can be subtle but critical differences. Always check the specific requirements of the country for which you are applying to avoid unexpected rejections. Key areas to verify include:
- Photo Size: Some countries may have different size requirements (e.g., some European countries use 35x45 mm). Using the wrong size can lead to immediate rejection.
- Background Color: While white is common, some countries may accept light gray or blue backgrounds. Adhering to the specified background color is essential.
- Head Position: Specific requirements for head tilt and facial orientation may vary. Proper head positioning ensures accurate biometric readings.
Common Reasons for Passport Photo Rejection
Knowing the common pitfalls can help you avoid them from the outset. Here's a detailed breakdown of the most frequent mistakes applicants make, leading to rejection:
Issues with Photo Quality and Composition
- Poor Lighting: Shadows, glare, or uneven lighting can obscure facial features, making identification difficult.
- Blurry or Out-of-Focus Photos: A lack of sharpness makes it difficult to identify the individual, hindering biometric analysis.
- Incorrect Size or Dimensions: Photos that are too large or too small will be rejected, as they don't meet standardization protocols.
- Background Issues: Non-white backgrounds, patterns, or objects in the background are common causes for rejection, distracting from the applicant's face. Learn more about decoding the US passport photo background.
- Low Resolution: Pixelated or grainy photos lack the necessary detail for accurate identification.
Problems with Facial Appearance and Attire
- Non-Neutral Expression: Smiling too broadly, frowning, or squinting can cause rejection. It's important to know if it is okay to smile in a passport photo. Expressions should be natural but not excessive.
- Head Coverings: Unless worn for religious or medical reasons (with documentation), hats and head coverings are prohibited. Understand more about wearing hats in passport photos.
- Eyeglasses: As mentioned, eyeglasses are generally not allowed unless medically necessary. You can also see our information on passport photo with glasses requirements.
- Jewelry: Excessive or distracting jewelry can obscure facial features. Ensure to check what jewelry is allowed in passport photos. Jewelry should be minimal and not detract from facial visibility.
- Incorrect Attire: Uniforms or clothing that resembles uniforms are not permitted, as they can misrepresent the applicant's identity.
Biometric Issues and Compliance
- Incorrect Head Size or Position: The head must be properly positioned within the frame, meeting specific size requirements for accurate biometric mapping.
- Obstructed Facial Features: Hair, shadows, or accessories that obscure the face can lead to rejection, preventing proper biometric analysis.
- Red Eye: Red eye can distort facial features and affect biometric analysis, causing inaccurate readings.
- Digital Alterations: Any digital manipulation or retouching of the photo is strictly prohibited, as it compromises the integrity of the biometric data. Ensure you are using the right photo paper with the ultimate guide to choosing the perfect passport photo paper.
DIY Passport Photo Tips & Tricks
Taking a compliant passport photo at home is achievable with the right preparation and technique. Here's a step-by-step guide to help you master the process:
Setting Up Your Photo Environment
- Lighting:
- Choose a well-lit room with natural light. Natural light provides the best and most even illumination.
- Avoid direct sunlight, which can create harsh shadows. However, if there is too much light, it can cause dark eyes in passport photos.
- Use a white reflector or sheer curtain to diffuse the light. Diffusion softens the light and reduces harsh shadows.
- Ensure even lighting across your face. Even lighting highlights all facial features without distortion.
- Background:
- Find a plain white or off-white wall. A smooth, light-colored surface is ideal.
- Alternatively, use a white sheet or poster board as a backdrop. Ensure it's wrinkle-free and evenly lit.
- Make sure the background is smooth and free of any patterns or objects. A clean background keeps the focus on you.
Posing and Composition Techniques
- Positioning:
- Stand or sit directly facing the camera. This ensures a frontal view, as required.
- Keep your head level and your shoulders relaxed. Proper posture aids accurate biometric readings.
- Ensure your entire face is visible and unobstructed. This includes hair, shadows, and accessories.
- Facial Expression:
- Maintain a neutral expression or a natural smile. Avoid exaggerated expressions.
- Keep your eyes open and looking directly at the camera. Direct eye contact is essential.
- Avoid squinting, frowning, or raising your eyebrows. These can distort your facial features.
- Distance:
- Position yourself about 2-3 feet away from the background. This prevents shadows and allows for proper focus.
- Have someone else take the photo to ensure proper framing and focus. This helps maintain composure and framing.
Using Your Smartphone or Digital Camera
- Camera Settings:
- Set your camera to the highest resolution. High resolution ensures clear, detailed images.
- Disable the flash to avoid harsh shadows. Natural light is preferable to artificial flash.
- Use the timer function or a remote shutter to avoid camera shake. Stability ensures a sharp, clear photo.
- Taking the Photo:
- Take several photos to ensure you have a good selection to choose from. Multiple shots increase the chances of capturing the perfect photo.
- Review the photos immediately to check for lighting, focus, and composition. Immediate review allows for quick adjustments.
Editing and Printing Your Photo
- Cropping and Resizing:
- Use a photo editing tool to crop and resize the photo to 2x2 inches (51x51 mm). Precise dimensions are critical for acceptance.
- Ensure the head size meets the required dimensions. Proper head size ensures accurate biometric analysis.
- Adjusting Brightness and Contrast:
- Make minor adjustments to brightness and contrast if necessary. Subtle adjustments enhance the photo without altering appearance.
- Avoid over-editing or altering your appearance. Alterations can lead to rejection.
- Printing:
- Print your photo on high-quality photo paper. Quality paper ensures accurate color and detail.
- Use a color printer to ensure accurate color reproduction. Accurate color is essential for compliance.
- Consider printing at a local pharmacy or photo center for best results. You may be able to get a Walmart one hour photo. Professional printing often yields better results.
Dress Code Guidelines: What to Wear (and What Not to Wear)
The clothing and accessories you choose for your passport photo can significantly impact its acceptance. Understanding these guidelines is key. Here's a detailed breakdown:
Acceptable Attire
- Everyday Clothing: Wear your normal, everyday attire. Authenticity is important.
- Solid Colors: Solid, neutral colors are generally recommended to avoid distractions. Solid colors keep the focus on your face.
- Collared Shirts: A collared shirt can help frame your face and provide a more professional look. Framing can enhance the photo's composition.
Unacceptable Attire
- Uniforms: Avoid wearing any type of uniform, including work uniforms or military attire. Uniforms can misrepresent your identity.
- Clothing That Resembles a Uniform: Steer clear of clothing that could be mistaken for a uniform. Ambiguity can lead to rejection.
- Off-the-Shoulder Tops: These can make it appear as if you are not wearing any clothes. The focus should be solely on your face.
Accessories: A Delicate Balance
- Hats and Head Coverings: Generally prohibited unless worn for religious or medical reasons (with supporting documentation). Facial visibility is paramount.
- Eyeglasses: Only allowed with medical documentation. Consider passport photo with glasses requirements before taking your passport photo. Glare and obstruction are primary concerns.
- Jewelry: Keep jewelry minimal and avoid anything that could obstruct your face or cause glare. If you are going to wear them, consider what earrings are acceptable for a passport photo. Subtlety is key; avoid anything distracting.
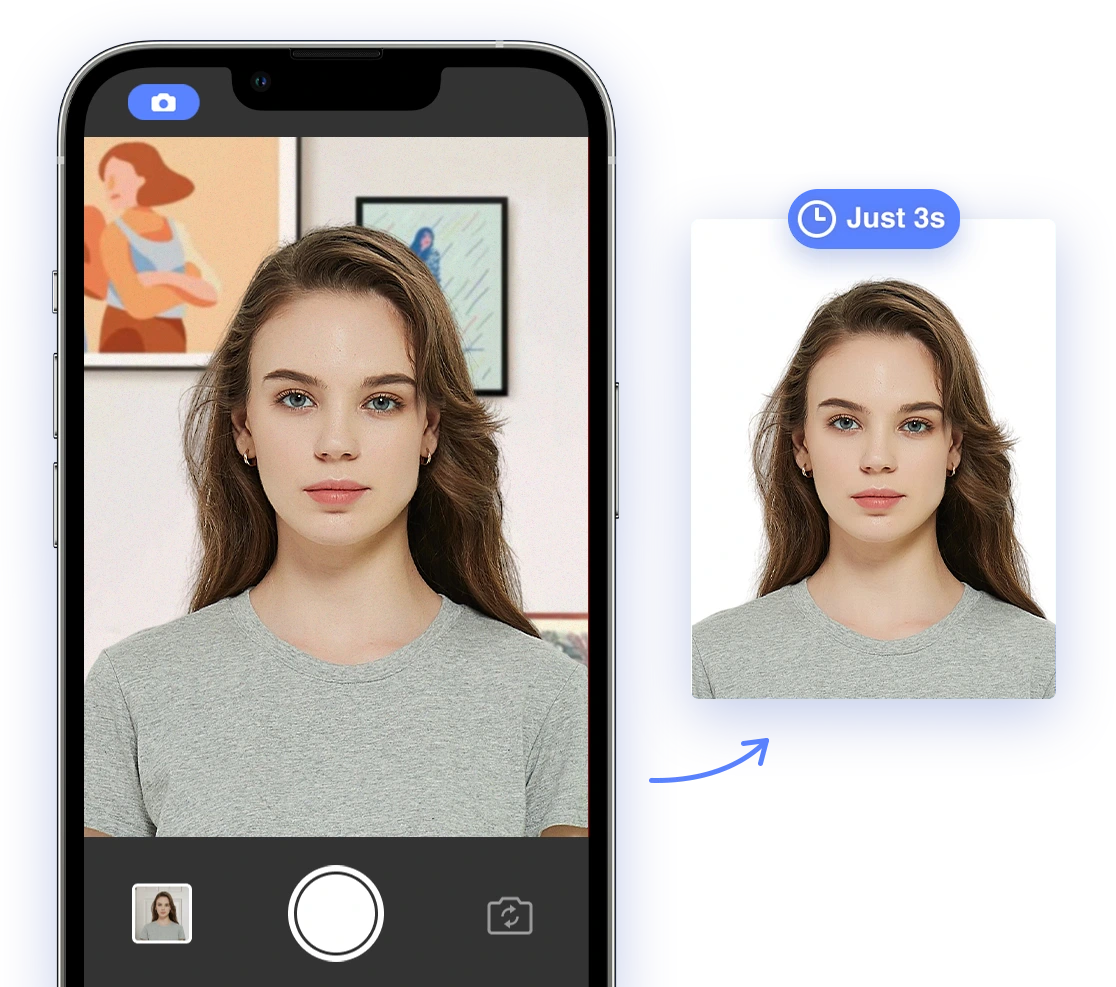
AI-Powered Solutions for Guaranteed Compliance
Artificial intelligence has transformed the passport photo process, offering tools that automatically check your photo for compliance and ensure it meets all necessary requirements. These AI-powered solutions analyze various aspects, improving accuracy and convenience.
- Size and Dimensions: Ensuring the photo is the correct size and the head meets the required proportions. AI accurately measures and crops photos.
- Background: Verifying that the background is plain white or off-white. AI identifies and corrects background issues.
- Lighting: Detecting shadows, glare, and uneven lighting. AI analyzes and optimizes lighting for clarity.
- Facial Expression: Checking for a neutral expression and open eyes. AI verifies appropriate facial features.
- Head Position: Ensuring the head is properly oriented and centered. AI assesses head position for compliance.
Benefits of Using AI Passport Photo Tools
- Accuracy: AI algorithms are highly accurate in detecting compliance issues, minimizing human error.
- Convenience: You can take and check your photo from the comfort of your home, saving time and travel.
- Speed: AI tools provide instant feedback, allowing you to make necessary adjustments quickly.
- Cost-Effectiveness: AI passport photo services are often more affordable than professional photo studios, making compliance accessible.
Step-by-Step Troubleshooting Guide: Addressing Specific Issues
If your passport photo has been rejected, don't despair! This step-by-step troubleshooting guide will help you identify the specific problem and find a solution. A systematic approach ensures effective resolution.
Step 1: Review the Rejection Notice
- Carefully read the rejection notice to understand the specific reason for rejection. Understanding the rejection reason is the first step.
- Pay attention to any specific instructions or recommendations provided. Specific guidance is crucial for correction.
Step 2: Analyze Your Photo
- Compare your photo to the official requirements and guidelines. Direct comparison reveals discrepancies.
- Check for issues related to size, background, lighting, facial expression, and attire. Identifying all issues is essential for a successful retake.
- Use an AI passport photo tool to identify any compliance issues. AI tools provide automated and accurate analysis.
Step 3: Make Necessary Adjustments
- Depending on the reason for rejection, make the appropriate adjustments to your photo. Addressing each issue is critical.
- This may involve:
- Adjusting the lighting.
- Changing your facial expression.
- Correcting the background.
- Removing accessories.
- Recropping or resizing the photo.
Step 4: Retake the Photo
- Once you've made the necessary adjustments, retake your passport photo. A fresh attempt with corrections is essential.
- Follow the DIY tips and tricks outlined earlier in this guide. Proper technique ensures compliance.
- Use an AI passport photo tool to check the new photo for compliance. Verification guarantees acceptance.
Step 5: Seek Professional Assistance (If Needed)
- If you're still having trouble taking a compliant photo, consider seeking professional assistance. Professional help can resolve persistent issues.
- Visit a professional photo studio or passport photo service. Expertise can address specific challenges.
- Explain the issues you've been experiencing and ask for their guidance. Clear communication ensures targeted assistance.
Global Passport Photo Requirements: Key Differences
Traveling internationally requires understanding that passport photo requirements vary from country to country. Thorough research is crucial for global compliance.
Size and Dimensions
- While 2x2 inches (51x51 mm) is standard in the US, other countries may use different sizes. Familiarize yourself with destination requirements.
- For example, many European countries require photos to be 35x45 mm. Note specific measurements for accuracy.
- Always check the specific size requirements for the country you're applying to. Verification is paramount for avoiding rejection.
Background Color
- While white is the most common background color, some countries may accept light gray or blue. Be aware of acceptable variations.
- Verify the acceptable background colors for your destination country. Compliance with background color is essential.
Facial Expression
- While the US allows for a neutral expression or a natural smile, some countries require a strictly neutral expression. Adjust expression accordingly.
- Be sure you know if it is okay to smile in a passport photo. Confirm the permissibility of smiling.
Head Coverings
- While religious and medical head coverings are generally accepted, some countries may have stricter requirements or limitations. Understand specific limitations before taking your photo.
- Always check the specific guidelines for head coverings in your destination country. Verification prevents issues at the time of application.
The Future of Passport Photos: Biometrics and AI
Advancements in biometric technology and artificial intelligence are revolutionizing passport photo requirements and the application process. The future is innovative.
Increased Use of Biometric Data
- Biometric data, such as facial recognition, is becoming increasingly important for verifying identity and enhancing security. Security and accuracy are primary goals.
- Passport photos must meet stringent biometric standards to ensure accurate facial recognition. Compliance with biometric standards is non-negotiable.
AI-Powered Compliance Checks
- AI-powered tools are being used to automate the passport photo review process, ensuring compliance with all relevant requirements. Automation improves efficiency and accuracy.
- These tools can detect subtle issues that humans may miss, reducing the risk of rejection. AI's precision minimizes errors.
Online Passport Photo Submission
- Many countries are now allowing online passport photo submission, making the application process more convenient and efficient. Digital submission enhances accessibility.
- However, it's crucial to ensure your digital photo meets all technical requirements for online submission. Technical compliance remains essential.
Compliant Passport Photos: Beyond Travel Documents
While you may be getting these passport photos for you or your child's passport, compliant photos can have uses beyond just this single purpose. Versatility enhances the value of compliant photos.
Secure Online Identity Verification
- Online platforms are increasingly using compliant ID photos for identity verification, helping prevent fraud and ensuring secure access to services. Security measures are enhanced with standardized photos.
Creating Personalized Gifts
- Compliant photos can be used to create personalized gifts, such as keychains, mugs, and phone cases. Creativity knows no bounds with a good photo.
Preserving Family History
- Digitizing family photos and creating compliant ID photos can help preserve family history and create lasting memories. Legacy preservation becomes more accessible.
Pet Identification
- In some cases, compliant ID photos can be used for pet identification purposes, such as creating pet ID cards or microchip registrations. Even pets benefit from standardized photos.
Reasons for Passport Denial
It's not just the photo that can cause issues with your passport application. There are also 5 Common Reasons Why Your U.S. Passport Application Could Be Rejected.
Conclusion: Mastering Passport Photo Compliance for Stress-Free Travel
Obtaining a compliant passport photo doesn't have to be a daunting task. By understanding the requirements, following our DIY tips, leveraging AI-powered tools, and troubleshooting any issues that arise, you can ensure your photo meets all official standards and your passport or visa application is processed smoothly. Remember to always double-check the specific requirements of the country you're applying to and stay up-to-date with the latest regulations. With a little preparation and attention to detail, you can conquer the passport photo challenge and embark on your travels with confidence!
Ready to get started? Use our AI passport photo tool today for a guaranteed compliant photo and a stress-free application process!