Passport Photo Upload Troubles? A Step-by-Step Troubleshooting Guide
Applying for a passport is an exciting step towards your next adventure! However, the online application process can sometimes be frustrating, especially when it comes to uploading your passport photo. Many applicants encounter technical issues that lead to delays and confusion. This guide is designed to help you navigate these challenges, providing clear, actionable solutions to common passport photo upload problems. By understanding the requirements and following these tips, you can ensure a smoother and more efficient application process. Let's get started!
1. Understanding Acceptable File Formats and Sizes
One of the most frequent hurdles in uploading passport photos is adhering to specific file format and size requirements. Government websites and online application portals often mandate particular formats and impose size limitations to ensure efficient processing and storage of images. Failing to meet these criteria can result in upload failures and application delays. Let's break down what you need to know.
Acceptable File Formats:
- JPEG (.jpg or .jpeg): JPEG is a widely supported format known for its ability to compress images effectively, reducing file size without significant loss of quality. It's often the preferred format for online applications due to its balance of quality and size.
- PNG (.png): PNG is another common format that offers lossless compression, meaning it preserves image quality without any data loss. While PNG files tend to be larger than JPEGs, they are suitable when preserving fine details is crucial. Use PNG if image quality is your top priority.
Size Limitations:
Passport application systems typically impose size limitations measured in kilobytes (KB) or megabytes (MB). These limitations are in place to prevent overloading servers and ensure quick loading times. Size restrictions vary depending on the application portal, so always check the specific instructions for your application. Common ranges include:
- Minimum: 50 KB
- Maximum: 2 MB (2000 KB)
How to Convert and Compress Images:
If your photo is in an unsupported format or exceeds the size limit, don't worry! You'll need to convert or compress it. Here’s how:
- Using Online Conversion Tools: Numerous online tools, such as CloudConvert and Zamzar, allow you to convert images between different formats easily. Simply upload your image, select the desired output format (JPEG or PNG), and download the converted file. These tools are user-friendly and often free for basic use.
- Using Image Editing Software: Programs like Adobe Photoshop, GIMP (a free alternative), and even basic photo editing apps on your smartphone can be used to resize and compress images. Open your photo in the software, adjust the dimensions and quality settings, and save it in the appropriate format.
- For Compression: In most image editing software, you can adjust the compression level when saving a JPEG file. Lowering the quality setting reduces the file size, but be cautious not to decrease it too much, as it can compromise image clarity. Experiment with different compression levels to find the best balance between size and quality. A setting of 60-80% often works well.
2. Resolving Resolution and Dimension Problems
Beyond file format and size, the resolution and dimensions of your passport photo are critical for acceptance. These specifications ensure that the image is clear, detailed, and suitable for biometric analysis. Let's dive into the specifics.
Required Pixel Dimensions:
Pixel dimensions refer to the width and height of the image measured in pixels. The U.S. Department of State requires that passport photos have specific dimensions to ensure proper facial recognition and printing quality. The standard dimensions are:
- Minimum: 600 x 600 pixels
- Recommended: 1200 x 1200 pixels
Resolution (DPI):
Resolution, measured in dots per inch (DPI), indicates the level of detail in an image. A higher DPI means more dots per inch, resulting in a sharper and more detailed photo. For passport photos, a DPI of 300 is generally recommended. This ensures the photo will print clearly if needed.
How to Adjust Resolution and Dimensions:
- Using Image Editing Software:
- Open your photo in image editing software like Photoshop or GIMP.
- Go to the “Image Size” or “Resize” option (usually found under the 'Image' menu).
- Enter the required pixel dimensions (e.g., 1200 x 1200). Make sure the 'Constrain Proportions' or 'Maintain Aspect Ratio' box is checked to avoid distorting the image.
- Ensure the resolution is set to 300 DPI. If necessary, resample the image to achieve this resolution, but be mindful of potential quality loss. Resampling adds or removes pixels, so only do this if necessary.
- Using Online Tools:
- Several online tools, such as ResizePixel and iLoveIMG, allow you to adjust the resolution and dimensions of your photo without needing to download any software.
- Upload your image to the tool.
- Enter the desired pixel dimensions and DPI.
- Download the resized image. Double-check the final dimensions to make sure they are correct.
3. Addressing Background and Lighting Errors
The background and lighting of your passport photo play a significant role in its acceptance. Non-compliant backgrounds (such as those with shadows or patterns) and poor lighting can obscure facial features and lead to rejection. A good photo is key to a smooth application!
Background Requirements:
- Color: The background must be plain white or off-white. Avoid any colors or patterns.
- Texture: The background should be smooth and free of any patterns or textures. A plain white wall or sheet works best.
- Shadows: There should be no shadows on the background or the applicant’s face. Ensure even lighting.
Lighting Requirements:
- Even Illumination: The face should be evenly lit, with no harsh shadows or highlights. Soft, diffused light is ideal.
- Natural Light: Natural light is best, but avoid direct sunlight, which can cause harsh shadows. An overcast day or a shaded area is perfect.
- No Red-Eye: Red-eye effect must be eliminated. Most photo editing software and apps have a red-eye removal tool.
Tips for Taking Photos with Proper Lighting and Background:
- Set Up the Background:
- Find a wall that is white or off-white. If you don't have a suitable wall, hang a white sheet or use a large piece of white paper.
- Ensure the wall is smooth and free of any textures or patterns.
- Remove any objects or decorations from the background that could cause shadows or distractions.
- Optimize Lighting:
- Position yourself near a window to take advantage of natural light. Face the window to get the best light on your face.
- Avoid direct sunlight by using a sheer curtain or shooting on a cloudy day. This will diffuse the light and prevent harsh shadows.
- If natural light is insufficient, use soft, diffused artificial light. Two lamps placed on either side of you can provide even lighting.
- Ensure the light is evenly distributed across your face. Check for shadows under your eyes or nose.
- Using Background Removal Tools:
- If you can't achieve a plain white background, use online background removal tools like Remove.bg or Clipping Magic.
- Upload your photo to the tool, and it will automatically remove the background.
- Ensure the resulting image has a plain white background before submitting. These tools can save you time and effort.
For more information about background requirements, see our article:
Decoding the US Passport Photo Background: Colors, Requirements & AI Solutions [2024-2025].
4. Dealing with Facial Recognition Issues
Facial recognition software is used to analyze uploaded passport photos to ensure they meet specific criteria. Several factors can cause failures, including obstructions, expressions, and image quality. Understanding these factors is crucial.
Factors Affecting Facial Recognition:
- Obstructions: Hair, hats, or other accessories that cover portions of the face can interfere with facial recognition. Make sure your face is fully visible.
- Expressions: Exaggerated expressions, such as wide smiles or frowns, can distort facial features and cause recognition failures. A neutral expression is required. Relax your face and look directly at the camera.
- Image Quality: Blurry or low-resolution images may lack the detail necessary for accurate facial recognition. Use a high-quality camera and ensure the photo is in focus.
Advice on Posing and Ensuring a Clear, Unobstructed Facial Image:
- Posing:
- Face the camera directly with your head level. Tilt your head slightly if needed to ensure you are looking straight at the camera.
- Maintain a neutral expression with your mouth closed. Avoid smiling, frowning, or squinting.
- Ensure both ears are visible (unless covered for religious reasons). Pull your hair back if necessary.
- Hair and Accessories:
- Keep hair away from your face so that your forehead and eyebrows are visible. Use hair clips or a hair tie to keep your hair in place.
- Remove any hats, scarves, or other accessories that cover your head (unless worn daily for religious reasons, with proper documentation). These can interfere with facial recognition.
- Eyeglasses are generally not allowed to avoid reflections or obstructions. Remove them if possible. If you must wear them for medical reasons, ensure there are no reflections and that your eyes are clearly visible.
- Image Clarity:
- Ensure the photo is sharp and in focus. A blurry photo will likely be rejected.
- Avoid blurry or pixelated images. Use a high-resolution camera or smartphone and take the photo in good lighting.
- Use a high-resolution camera or smartphone. A smartphone with a good camera can work just as well as a professional camera.
5. Navigating Website or Application Errors
Encountering website or application errors during the upload process can be frustrating. These errors can stem from various sources, including browser compatibility issues, server problems, and timeout issues. Let's explore how to deal with these issues.
Common Website or Application Errors:
- Browser Incompatibility: Some websites are optimized for specific browsers. Using an incompatible browser can lead to upload failures. Check the website's help section for a list of recommended browsers.
- Server Errors: Server errors occur when the website’s server is experiencing problems, such as high traffic or technical issues. These are usually temporary.
- Timeout Issues: Timeout errors happen when the upload process takes too long, and the server cancels the request. This can be caused by a slow internet connection or a large file size.
Troubleshooting Steps:
- Check Browser Compatibility:
- Ensure you are using a compatible browser. Common compatible browsers include Google Chrome, Mozilla Firefox, Safari, and Microsoft Edge. Check the application website for specific recommendations.
- Update your browser to the latest version. Outdated browsers can cause compatibility issues.
- Try using a different browser to see if the issue persists. Sometimes, a different browser can resolve the problem.
- Clear Browser Cache and Cookies:
- Clearing your browser’s cache and cookies can resolve many website errors. These stored files can sometimes interfere with website functionality.
- Go to your browser’s settings and clear the cache and cookies. The process varies depending on your browser.
- Restart your browser and try the upload process again. This can help ensure a clean slate.
- Check Internet Connection:
- Ensure you have a stable and reliable internet connection. A slow or unstable connection can cause upload errors.
- Avoid using public Wi-Fi networks, which may be less secure and slower. Use a private, secure network instead.
- Restart your modem and router to refresh your internet connection. This can often resolve connectivity issues.
- Try Again Later:
- If the website is experiencing server issues, try again later when the traffic is lower. Server issues are often temporary.
- Avoid uploading during peak hours. Uploading during off-peak hours can reduce the chance of server errors.
6. Optimizing Photos for AI-Powered Tools
Many passport application systems now incorporate AI-powered tools to automatically check uploaded photos for compliance. Optimizing your photo for these tools can significantly increase your chances of acceptance. Let's look at how to do this.
Considerations for Contrast, Sharpness, and Overall Clarity:
- Contrast: Ensure your photo has adequate contrast, with clear separation between light and dark areas. A photo with good contrast will show details more clearly.
- Sharpness: The photo should be sharp and in focus, with no blurring or pixelation. Use a high-quality camera and ensure the subject is in focus.
- Overall Clarity: The image should be free of any distortions, artifacts, or other imperfections. Check for any unusual patterns or blemishes in the image.
Our article on
digital photo analyzers can provide additional insights into AI-powered compliance checks.
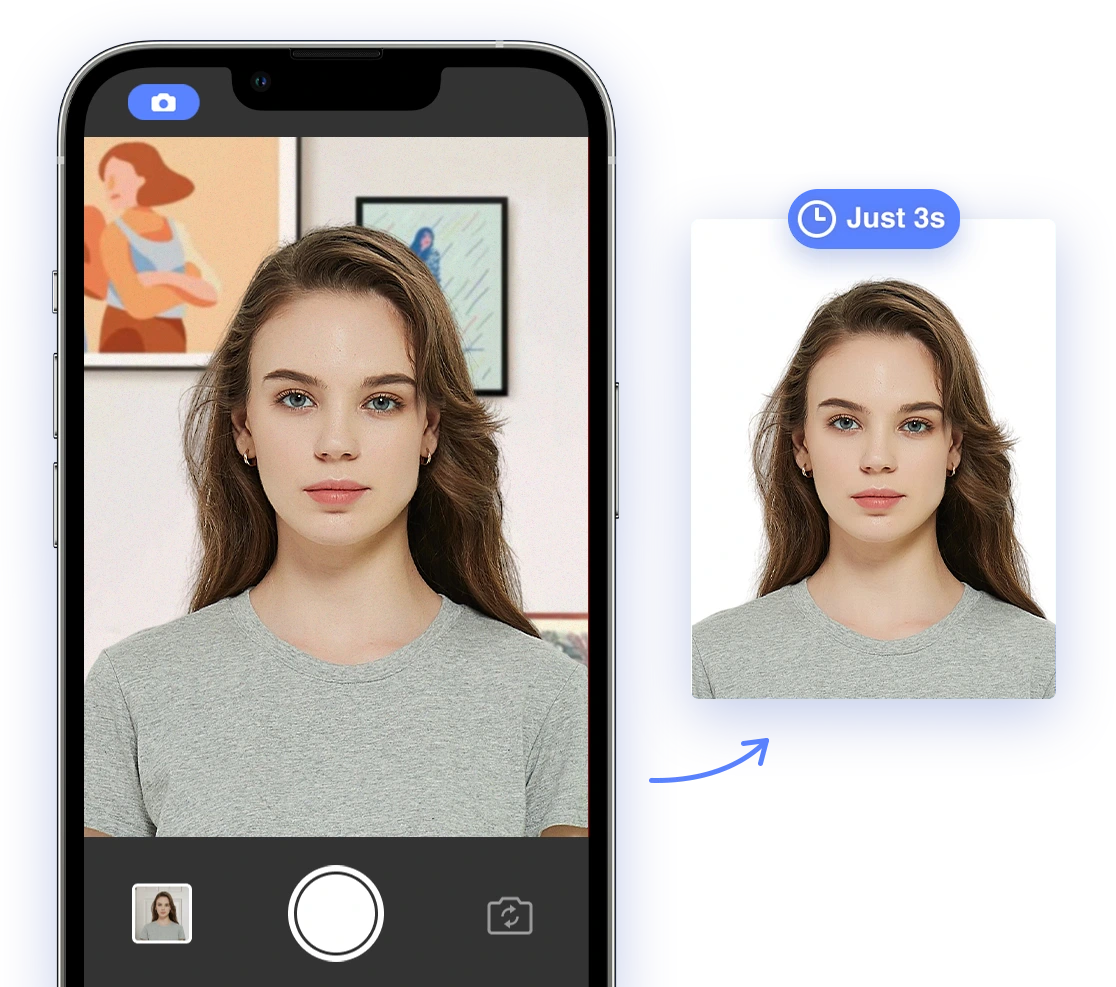
7. Step-by-step guides for using AI Passport Photo to avoid upload issues
Using a dedicated AI passport photo tool can drastically reduce the chances of upload errors. Here’s how to use AI Passport Photo:
- Download the AI Passport Photo App: Get the app on either iOS or Android. Search for "AI Passport Photo" in the App Store or Google Play Store.
- Take a Photo or Upload an Existing One: Follow the app's guidelines for taking a new photo or choosing one from your gallery. Pay attention to lighting and background. The app will provide real-time feedback.
- AI Checks and Adjustments: The app automatically checks for compliance, adjusting size, background, and resolution as needed. It will flag any potential issues.
- Review and Approve: Check the final version. The app ensures it meets all official requirements. Make sure everything looks correct before proceeding.
- Download and Submit: Download the compliant photo in the correct format and size, ready for upload without any issues. The app will save the photo in the required format and size.
By using AI Passport Photo, you ensure that your photo meets all technical and biometric requirements, eliminating common upload problems and streamlining your passport application. Ready to create a compliant passport photo?
Try AI Passport Photo Now!
See also these related guides to ensure a perfect passport photo:
8. Seeking Technical Support
If you’ve tried all the troubleshooting steps and are still experiencing upload problems, don’t hesitate to seek technical support from the passport application service. Most government agencies provide contact information for assistance with technical issues. They are there to help!
How to Contact Passport Application Support Services:
- Check the Website: Look for a “Contact Us” or “Help” section on the passport application website. This section typically provides email addresses, phone numbers, and live chat options. This is usually the quickest way to find help.
- Call the Support Hotline: Many agencies have dedicated support hotlines for passport-related inquiries. Check the website for the appropriate phone number. Be prepared for a potentially long wait time.
- Email Support: If phone support is unavailable or you prefer written communication, send an email to the support address listed on the website. Email support may take longer to respond, but it allows you to provide detailed information and screenshots.
When contacting support, be prepared to provide the following information:
- A detailed description of the problem you are experiencing. The more details you provide, the better they can assist you.
- The steps you have already taken to troubleshoot the issue. This will help them avoid suggesting solutions you've already tried.
- Your operating system and browser information. This helps them understand the technical environment you are using.
- Any error messages you have received. Include the exact wording of any error messages.
By following this comprehensive guide, you can effectively troubleshoot common passport photo upload issues and ensure a smoother, more efficient application process. Remember to pay close attention to file format and size requirements, resolution and dimensions, background and lighting, facial recognition factors, and website or application errors. With the right approach and tools, you can overcome these challenges and successfully submit your passport photo online. Good luck with your application, and happy travels!